Reflective summary

This project has been an interesting challenge. We were purposely ambitious with our aspirations and pushed ourselves to try and create a product that we were proud of. I have gained several valuable skills throughout, covering each of the learning outcomes I wanted to achieve.

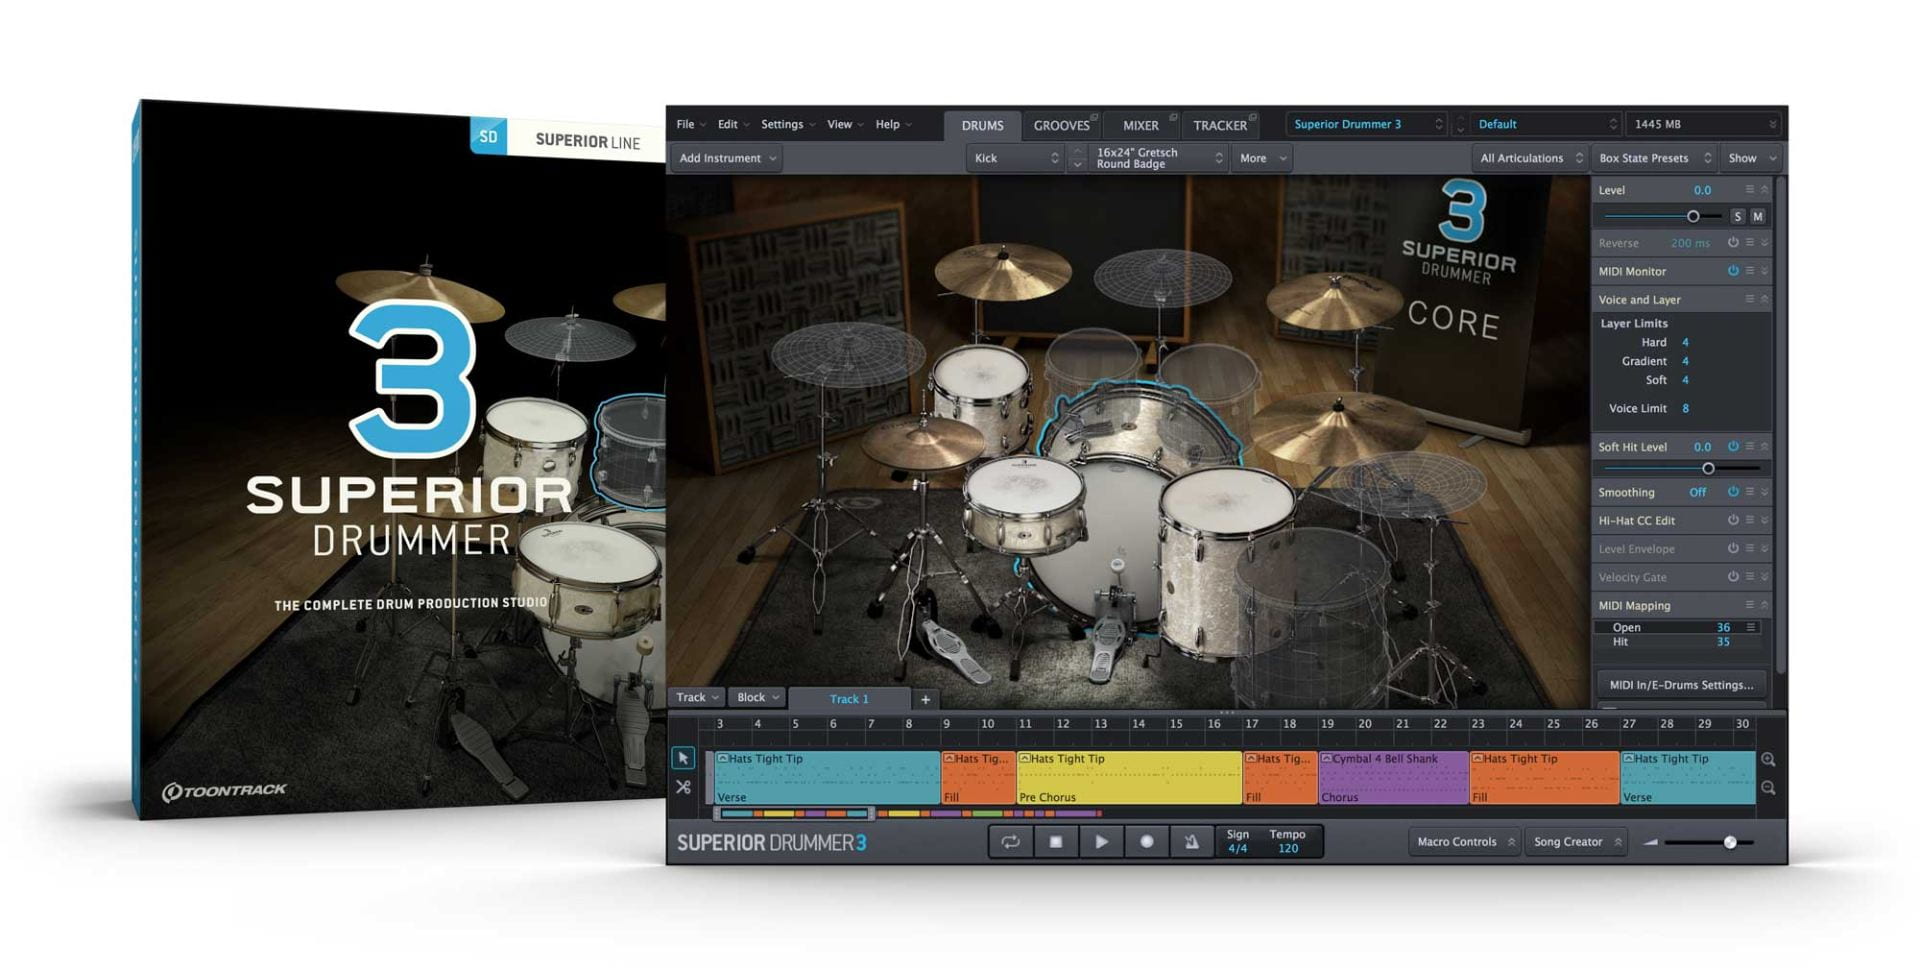
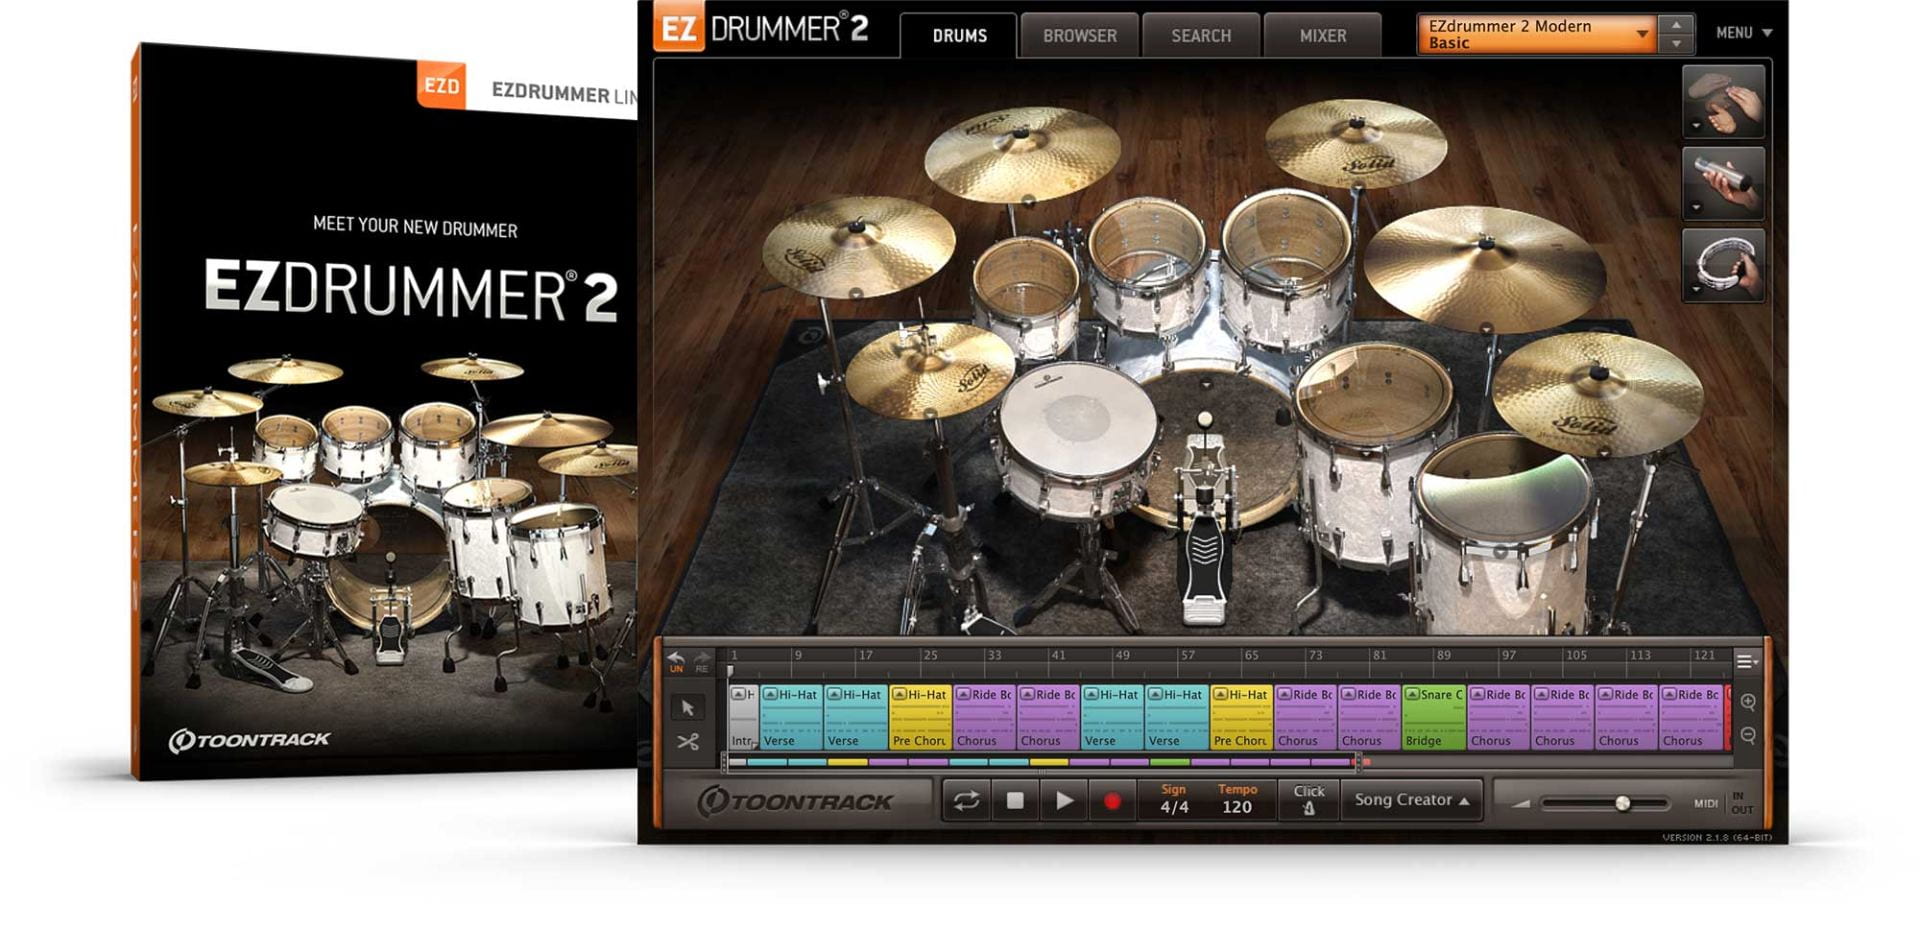
Beginning with market research really helped give an idea of what competing products offer, what customer base they are aiming for and highlighted gaps in the market. We noted that while there are a plethora of high-quality drum suites available, many of them such as Superior Drummer and Slate Drums cater to hi-fi productions. While these plugins contain samples recorded in some of the best studios in the world with world-class microphones and hardware, when trying to create a more lo-fi, gritty sound often found in punk, extreme metal and various other genres, it can feel out of place contrasting super polished high-quality drum recordings with the rest of the mix. One of the few competitors that offers something similar to what we wanted to create is Ugritone’s KVLT drums and while this serves a similar audience as our own, we wanted to make our own take on this. It would have been useful to conduct some primary customer research to inform our feature set, unfortunately, due to time constraints this was not achieved. We referred to various articles and forum discussions to gain an idea of peoples opinions of competitors as well as what features are desired, however creating a survey or offering up our Kontakt instrument for testing as an open beta would have been valuable in the development.

The most challenging aspect of the project was the creation of the Kontakt instrument itself. Recording the drums and editing the samples was relatively straightforward as I have previous experience recording drums and collating sample libraries. Importing the samples into Kontakt and assigning them to the keyboard was somewhat challenging as we had multi-sampled each instrument, meaning we had to assign velocity ranges to each sample on each instrument. This was time-consuming but not too difficult. The real challenge lay in the coding of the GUI. This required me to learn how to use Kontakt’s proprietary language, KSP, in order to create a working user interface. This by far was the hardest part of the project. With limited previous coding experience, there were many teething pains getting to grips with how KSP operated. In addition, being a very niche language, resources online were somewhat limited and much of what was available assumed a far higher level of knowledge than I possess. If I were to approach this again, time spent learning core concepts of scripting in general as well as practising with KSP before undertaking the project proper would have been immensely valuable.

Despite these difficulties, I feel I have gained a solid basic knowledge of how the backend of Kontakt operates and feel that with further practice and research I will be able to implement all our desired features. When planning our project we set out a large set of desired features we wanted to implement. When doing this we organised these by those we wished to have in a working proof of concept and those that would be reserved for future implementation. In hindsight, while this was good foresight of the complexity of development, it would have perhaps been pertinent to aim for an even more restricted feature set for our initial prototype. with further research, it became apparent that some of the key features we wanted such as assignable multi-channel outputs and individual bleed controls for each mic would be far more complex to implement than initially thought. To manage this we further limited our initial feature set to the absolute bare minimum. We created 4 separate groups: kick, snare, toms and cymbals which had volume faders assigned, allowing a basic mix to be created. In addition, we added a global reverb. In later versions, we would like to have reverb assignable to each individual track, but the current state allows the user to use the sample library in their DAW of choice with limited functionality.

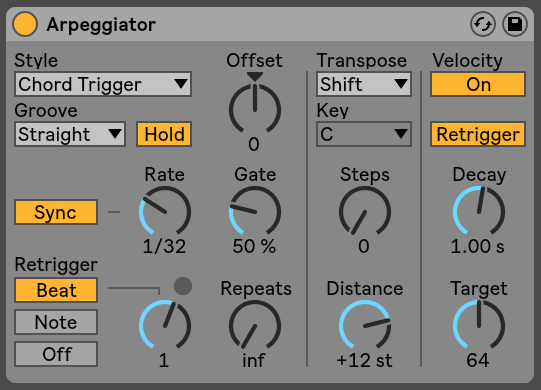
With regards to difficulties I had during the coding process, it would have perhaps been better to use a different platform for our sample library like Max For Live. I have some familiarity with Max and the visual aspects of its workflow make it easier to organise the plugin. The main drawback to this and the reason we decided to use Kontakt is Max would make it Ableton exclusive and we wanted it to be useable by as many people as possible.

Project management skills were key to the success of this project and as a whole, I feel I was successful in the management of this. I booked the studio for recording well in advance, allowing us plenty of time to focus on the development side of the project. Working to a deadline meant that decisions had to be made in regards to what features we wished to keep. While this deadline meant we couldn’t submit a product with as much functionality as we had hoped I feel this experience has given me an important insight into the prioritisation of different aspects when undertaking a project as well as being analytical and using previous research to inform decisions that were made.

To conclude, I feel that while several challenges were presented to us during the course of this project I feel that we have been successful in what we set out to achieve. With a clear roadmap of future features and a solid base to work on, this project could potentially become a fully fleshed out drum suite with a wide range of user customisation. I will be continuing with the development of this as it will be a valuable resource for learning as well as an important professional skill. Additionally I feel the research and management skills I have gained will be immensely important going forward with my professional development.

Recording and Production

With Zac having successfully made a test library, we began the recording process. We used a 4 piece drum kit with a large variety of cymbals, both from the university cymbal pack and Zacs own. We decided this would give users a wider variety of options when tweaking the library (Fig. 1)

Figure 1. Final set-up of the drumkit.


We set up the kit in the main live room in studio 1, using a rug and dividers to prevent standing waves and unwanted resonances. The snare was close miced on the top and bottom using an Audix i5 and Shure SM57 respectively. For the toms we used an Audix D2 on the rack and a D6 on the floor tom, the kick was miced with a D4. We swapped the D4 and D6 from their standard recommended setup as we found the D6 lacked the attack we wanted for the kick and enhanced the power in the low end for the floor tom. We decided to close-mic the main high-hats to give the user more flexibility when placing them in the mix and used an Audix ADX51 small-diaphragm condenser. The ADX51 was well suited for this application as it has a maximum SPL of ≥132 dB as well as an emphasised top end response (see fig. 2). Lastly, we used a matched pair of AKG C414s as a stereo pair of room mics as well as a Neumann U87 as a mono ambient room mic. This combination was particularly useful as we desired a strong sense of space in the sample library creating the sense of natural drums.

Figure 2. Audix ADX51 frequency response chart. The emphasis on high mids and highs made this ideal for the Hi-hat close mic

Once set up we level checked each mic to ensure no clipping and sufficient headroom. Then each mic was routed through the desk into Ableton where we began tracking. For each individual drum or cymbal, we recorded several individual hits, starting with the most light to the hardest hits, ensuring we allowed the tails to ring out fully. While we recorded each individual element separately we recorded all the mics simultaneously. This allowed us to mix bleed from each track together giving a sense of cohesion and realness as well as allowing us to implement a bleed control function in the future.


GUI Development: Interactable objects

Following the research into skeuomorphism, I began designing knobs and sliders that allow the user to interact with the GUI. to do this is used a free software called Knobman. Knobman allows the easy design of knobs, sliders and faders by layering objects and animation steps. This makes the process considerably easier than creating them manually in photoshop and allows real-time preview of the animated knob.

With Knobman I prototyped several different knob and fader designs before settling on a select few. I tried to recreate real-world knobs used on audio hardware. I tried to create a grungy, raw feel to match the sound of our samples and really sell the idea of the sample library.

The knobs are output by knobman as a .PNG file as a column of each frame of animation the knob has. This can then be assigned to a GUI element in the Kontakt GUI editor.

Sliders can also be created in Knobman, by changing the type of animation of elements from rotating to vertical. Using this I designed a fader to be similar to those found on a mixing console.

GUI Development : Interface Objects and Skeuomorphism

The GUI (graphical user interface) is an important part of the user’s experience with a piece of software. The GUI represents the visual elements of the program and good GUI design is key to ease of use. While ease of use and clear access to features are paramount in GUI design the visual aesthetics are also important. The aesthetics of the GUI allow the developer to create the visual identity and branding of the plugin. Visual identity can be used to reflect the features of the plugin.

A common design element used in audio plugins is skeuomorphism. Skeuomorphism describes interface objects that mimic a real-life object, for example, a knob or fader. This gives the user an instant understanding of how to use this feature as they are familiar with the real-world equivalent. Skeuomorphism can range from being highly accurate to a real-world object or piece of musical equipment, such as Universal Audio’s 1176 compressor plugin which is a faithful recreation of the classic studio rack compressor (fig. 1), to more abstract and simplified versions of knobs and sliders such as those used in Ableton’s interface (fig. 2).

Further Market research and development of our Kontakt library will inform the route we will take in designing our GUI and I will elaborate further on our process in future posts.

Fig. 1 UA 1176 Compressor is modelled after the real rack unit.
Fig. 2 Ableton uses a more simplified, abstract GUI design making each controls function clear.

Guest Lecture: Luke Pickering – The Church Studios

In week 3 we were joined by Luke Pickering, in-house engineer, assistant engineer, and mixer at The Church Studios in London. Luke began by giving us some background on his work at The Church as well as some of his production credits such as working with Mumford & Sons and Stormzy. Luke then described his path from graduating from the University of Lincoln to his current role and offered advice on getting into the industry. He explained the hierarchy of a professional studio from runner to assistant engineer to producer and what each role involved. Starting as a runner in his initial placement at The Church, Luke explained that his role was to generally assist, cleaning, making drinks and other tasks. He emphasized that initiative and good work ethic were key to getting noticed and progressing. He explained that when applying for runner and intern roles it is crucial to show an understanding of the role, stating that you are a producer, engineer, etc. and talking about your aspirations to be so show that you do not fully understand what is required from the role and will often result in unsuccessful applications. He explained that it is important to find your place in the team and show yourself to be a useful asset. By showing that you are responsible and can be relied on you will be given more responsibility and opportunities for studio work. As a service-based industry it is crucial to show you are responsible as you will be working along side clients and a high level of professionalism will be expected of you.

Learning Outcomes

LO 1: Understand the methods of effective market research and be able to apply them to inform the development of a product.

LO 2: Develop the software skills necessary to create a Kontakt sample library to a professional standard

LO 3: Develop project management skills for a professional project.

Tutorial Diary: Week 1

In our first tutorial sessions, we discussed our initial ideas for our project, creating a drum sample library. David suggested we research what existing products are on the market to inform our project and finding a niche for our product to sit in. We discussed wanting to create a library of more naturalistic, less polished and “hi-fi” drum sounds primarily for rock and metal production as we found a lot of modern metal production relies on very polished, sometimes artificial sounding drum libraries and the use of several popular kits and sounds can make a lot of productions sound samey and uninteresting. We then discussed our method of delivery. David suggested instead of just simply creating a basic library of sample files creating some sort of application or plugin for the prospective user to use in their chosen DAW software. We discussed our options for this, Max for Live device, Kontakt instrument, or standalone VST plugin and which would be the best option. Further research would be necessary but creating a Kontakt instrument seems to be the best option as this Kontakt or Kontakt player can be used with any DAW allowing the widest compatibility. Additionally, creating a Kontakt instrument would be significantly easier than creating a bespoke VST plugin which would require extensive C++ coding. This tutorial informed our next moves and we will begin our research.

Competitor Research: Toontrack Part 2: Superior Drummer 3

Continuing the analysis of Toontracks’ drum sample solutions in this post I will cover their flagship software, Superior Drummer 3. While EZ Drummer offers a useful tool for producers seeking high-quality drums with little work out of the box it is somewhat limited in customisation and tweakability of raw drum sounds, restricting the user to pre-processed drums with some basic mixing and additional processing features. Superior Drummer however gives the user a huge amount of flexibility when achieving their ideal drum sounds.

Superior Drummer offers many of the same features as EZ Drummer, a visual representation of the drumkit allowing the user to audition and swap between drums, a groove library offering a wide variety of pre-recorded midi files for different genres, a arrange view for arranging songs in the plugin itself and a mixer section. Superior Drummer however allows for far more in-depth mixing and processing options. The mix section allows the user to mix, pan, adjust bleed of each instrument individually on each mic, bus and group tracks, and further process the raw sounds using 35 included effects inserts. This gives the user a huge amount of freedom to get the exact drum sound they desire.

Superior Drummer offers a massive drum library with the core software with 7 different kits with different head and tool options (sticks, brushes, felt mallets, etc.) as well as over 250 electric drum sounds sampled from classic vintage drum machines combining to over 230GB of raw samples. All these samples were recorded by Grammy award-winning engineer George Massenburg at Galaxy Studios in Belgium with 11 room mics set up to offer up to 11.1 surround sound. In addition to the impressive library supplied with the base software, Superior Drummer like EZ Drummer offers a range of expansions or SDX as well as being compatible with EZ Drummer EZX expansions as well as 3rd party samples. This gives the user access to an enormous pool of source drum sounds.

Another unique feature new to the latest iteration of Superior Drummer is the Tracker. The tracker is a powerful tool that uses machine learning to convert existing multitracked drum audio to midi files. The tracker automatically works out what the source drum is by analysing over 500 frequency bands and transient shapes. The user can however change this if needed. In addition, the tracker will detect different articulations to replicate the drummer’s performance as accurately as possible. The user has access to a wide range of editing tools and features to ensure as accurate conversion as possible. Once the user is happy they can export either individual instruments or the whole mix as a single midi file either into the song view or onto their computer for use in DAWs.

Superior Drummer offers unrivaled drum shaping flexibility and absolute top quality raw drum samples allowing the user to achieve the best possible drum sound they can. One drawback however is that it can require a lot more work to achieve a finished drum sound compared to pre-mixed and processed drums and the amount of customisation can seem overwhelming. Less orthodox drum recording techniques such as the Glyn Johns method are also not supported meaning more experimental drum sounds may be harder to achieve. The super polished hi-fi drum sounds may also seem out of place with some genres of music where a more grungy “raw” sound may be more desirable.

In conclusion, Toontrack is an industry leader for a reason, they cater to various levels of producers and songwriters of all genres with the ease of use and creative inspiration or EZ Drummer and the deep dive customisation of Superior Drummer with world-class drum samples recorded by some of the best producers, engineers and drummers around.

Competitor Research: Toontrack Part 1: EZ Drummer 2

Toontrack is an industry leader in high-fidelity drum production suites. Through their products Superior Drummer 3 and EZ Drummer 2 they provide self-contained plugin-based or standalone drum sample libraries. EZ Drummer acts as the entry-level software for producers looking to use out-of-the-box pre-mixed and processed drum kits. The base software comes with 5 fully mixed and processed kits as well as additional percussion elements. This acts as a starting point with 2 separate sound libraries, modern and vintage.

In addition to the base program, Toontrack offer a wide range of “EZX Expansions” which contain different kits, mixed and recorded by a wide variety of engineers in several different studios. These are themed to specific genres with several different flavours of kits, for example, Metal Machine, Made of Metal, Modern Metal and Death Metal all cater for different styles of metal production with kits recorded by industry engineers such as Andy Sneap, Mark Lewis and Jason Suecof.

EZ Drummer provides the user with a clear interface, the main page contains an animated drum kit that the user can interact with, clicking a drum or cymbal to trigger the sample. this allows easy auditioning of individual instruments to create the perfect kit. In addition to the drums tab the user can further tweak their sound using a basic mixer tab, with faders and panning for each drum group as well as a simple effects chain with one knob operation for reverb, compression, cymbal and head pitch as well as mic bleed. This allows the user to tweak the predefined drum libraries more to their taste while being somewhat limited to the predefined processing.

A unique selling point of EZ Drummer is its “song creator” feature. here the user can use the browser tab to search midi packs, included in EZX Expansions and standalone midi packs, and drag and drop blocks of premade midi files into a timeline in the plugin and arrange their song completely in the plugin. This allows producers to quickly arrange an outline of their song using the provided midi files which can be dragged and dropped into their DAW of choice to edit further in their drum roll.

The pros of EZ Drummer depend on the users’ needs. the song creator, robust midi library and quick setup of the predefined drum sounds make EZ Drummer an excellent creative tool when arranging and composing music and is ideal for producers that want Pro Quality drums with little work to get them to sound good. The drawbacks to this however, are that user editing of individual drum sounds are limited, meaning that in a world where more and more producers are turning to in the box solutions for drum production these sounds can sound overused and lack the tweaking capabilities of other products to create a more unique drum sound. Another point of note is there is no support for 3rd party samples, which limits the scope of user customisation further.

In part 2 of this analysis I will look at Superior Drummer 3, Toontrack’s flagship drum suite, comparing the differences between the two as well as it’s pros and cons.

Introduction and Aims

Introduction

For Audio Project 2 I will be undertaking the development of a drum sample library for rock and metal producers. This undertaking will require several stages of research and development. Firstly we shall outline our overarching aims and learning outcomes.

Once our goals have been established we will begin research. This will include market and competitor analysis, enabling us to find a niche market for our sample library; Sampling techniques to inform our recording and compilation of the samples. The most challenging aspect of research will be deciding how to package the sample library for consumer use.

We have several options for how to package our library, Kontakt Library, VST/AU standalone plugin, and Max for Live instrument for example. Our research will inform what will be the best way to present our sample package for ease of use.

Aims and Objectives

Our goal for this project is to have a fully working, finished product that is ready for commercial release, however, in the time frame of this project that is very unlikely. Because of this, we will be aiming to create a functioning prototype with a limited feature set to showcase. This will require research to decide what features to focus on and what we would like to add for a final product; creating a development timeline.

Market research will be key in creating a successful product and therefore being able to conduct market analysis and research will be an important objective. Features will be decided by this research, giving us an idea of what competitors offer as well as what consumers want. This will allow us to prioritise development to have a prototype with the features deemed most important.

Careful planning, logistics and organisation will be essential to this project with the ability to organise the different stages of production and development being a core objective. We aim to have our core research completed before beginning the production stage so we can focus on the recording process and development completely.